

This was an extremely unique and fun quest to play, I enjoyed it from beginning to end. This certainly adds a very interesting spin to the standard Z1 experience with all of its brand new items, enemies and a wacky playstyle. Everything felt very familiar, yet really off with the entire quest being flipped. It definitely caught me off guard throughout the first half or so but once I got used to it, things went a lot more smoothly. A lot of the puzzles are extremely clever and creative, most of which I've never seen in a quest before. I got stuck quite a few times so this really does test your puzzle solving skills to a considerable degree. The general difficulty for my playthrough was nothing too bad (and I really like how you can modify these settings too) so things were very well balanced throughout.
I don't really have any critiques but I did find some water/lava tile errors in both Level-Cs where there seems to be missing tiles for the upper parts of the lava. It's a very minor thing so not a big deal, but still a thing I noticed. Another thing is that I managed to get myself stuck here. I'm not entirely sure how that happened, but I was messing around with the L2 Rope item and I just got stuck.
Overall, this was a very fun and enjoyable experience. I probably will replay the randomiser mode of this in the future, but for now I have other quests I want to finish first. Amazing work on this, easy 5/5 from me.
- Current Location:
- PureZC
- » PureZC Forums
- » Quests
- » 6th Quest Entry - Through the Inverse Glass
6th Quest Entry - Through the Inverse Glass
Overview
Feature Quest
Creator:
Mitsukara
,
Deedee
Genre: Scripted
Added: 14 Mar 2020
ZC Version: 2.53
Downloads: 479
Rating[?]:
")
|
Download Quest (6.93 MB) |
Information
Imagine Zelda 1, but distorted through a mirror. Everything is familiar, yet slightly off. All the items are new, all the enemies behave a little differently. Play as Princess Zelda (or a huge list of alternate costumes) in this semi-nonlinear quest with many item puzzles and a mode menu which lets you change your music, graphics, and gameplay settings anywhere. (NOTE: Please use ZC version 2.53.1. Ideally, Beta 31 or above!)
About Reviews Comments Forum Topics
Description
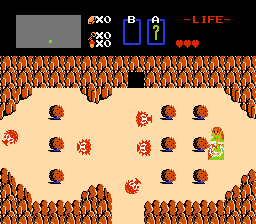
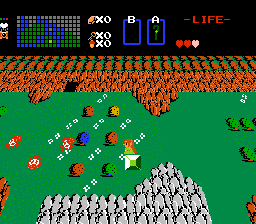
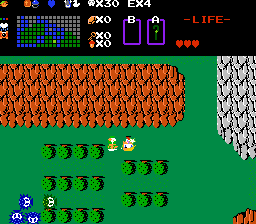
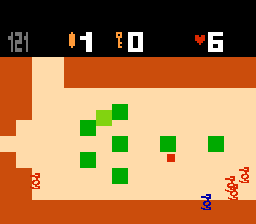
A sort of "what if" 6th quest, with a very simplistic NES-style story and many faithful elements to Zelda 1, but with totally new items, different behaviors for familiar enemies, a mirrored overworld, and a twisted new form of familiar dungeon design and caves.
Although very Zelda 1-based and with a few cryptic elements of NES style design, there are also much more complex puzzles involving new items that could not appear in Zelda 1 (although this quest is nowhere near as complex as Link and Zelda: Panoply of Calatia, and is meant to be more approachable and simple than that.)
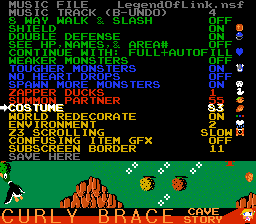
An optional Mode Menu (press the Map button) allows you to change the game's entire presentation, such as how the game scrolls, whether the player can move in Zelda 1 four-way style or eight-way diagonal movement, the difficulty of monsters, the ability to attack with the mouse, what music is playing, how advanced the graphics colors are, custom character costumes, and more! There's no wrong way to play, so pick any settings you think would be more fun!
A manual of all modes is included with the quest, in "Mitsukara 6th - Mode Menu Manual and Costume List.txt".
Full list of costumes (in a spoiler block because it's a long list:
Although very Zelda 1-based and with a few cryptic elements of NES style design, there are also much more complex puzzles involving new items that could not appear in Zelda 1 (although this quest is nowhere near as complex as Link and Zelda: Panoply of Calatia, and is meant to be more approachable and simple than that.)
An optional Mode Menu (press the Map button) allows you to change the game's entire presentation, such as how the game scrolls, whether the player can move in Zelda 1 four-way style or eight-way diagonal movement, the difficulty of monsters, the ability to attack with the mouse, what music is playing, how advanced the graphics colors are, custom character costumes, and more! There's no wrong way to play, so pick any settings you think would be more fun!
A manual of all modes is included with the quest, in "Mitsukara 6th - Mode Menu Manual and Costume List.txt".
Full list of costumes (in a spoiler block because it's a long list:
Spoiler
0. Zelda - Main tiles from Super Mario Crossover, by Exploding Rabbit
1. Link
2. Marin (Link colors) - from Link's Awakening, but NES Style
3. Marin (Blue & Red) - from Link's Awakening, but NES Style
4. Din - from Oracle of Seasons, but NES Style
5. Nayru - from Oracle of Ages, but NES Style
6. Nayru (Veran-possessed) - from Oracle of Ages, but NES Style
7. Farore - from Oracle of Ages & Oracle of Seasons, but NES Style
8. Impa (old) - from Zelda 1 manual & Zelda II manual
9. Impa (young) - from Hyrule Warriors
10. King Harkinian - from The Legend of Zelda cartoon & Valiant Comics
11. King Harkinian (CD-i) - from Zelda: The Wand of Gamelon & Link: The Faces of Evil
12. Duke Onkled - from Zelda: The Wand of Gamelon
13. Subrosian - from Oracle of Seasons
14. Rosa - from Oracle of Seasons
15. Darunia - from Hyrule Warriors
16. Lana - from Hyrule Warriors
17. Abei - Z1 Old Man
18. Ama - Z1 Old Woman
19. Merchant
20. Darknut
21. Wizzrobe
22. Goriya
23. Zora
24. Octorok
25. Moblin
26. Vire
27. Lynel
28. Zol
29. Pols Voice
30. Tektite
31. LikeLike
32. Wallmaster
33. Stalfos
34. Gibdos
35. Gibo - From A Link to the Past, but NES style
36. Sluggula - From A Link to the Past, but NES style
37. Bari - From A Link to the Past, but NES style. Tiles by P-Tux7
38. Aquamentus
39. Dodongo
40. Manhandla (Tiny)
41. Manhandla Head - Note: as a partner costume, this is instead a Manhanda Body
42. Gleeok (tiny)
43. Digdogger (kid)
44. Gohma (tiny)
45. Patra
46. Fairy
47. Gannon (Tiny) - from Zelda 1
48. Link's Shadow - AKA Dark Link
49. Zelda's Shadow - AKA Dark Zelda
50. Bunny Link - from A Link to the Past, but NES style
51. Link (Cheerleader) - from Triforce Heroes, but NES style
52. Return of Uncool
53. Mario - as seen in Super Mario Bros 1
54. Mario (Red & Blue)
55. Luigi - as seen in Super Mario Bros 1
56. Luigi (Green & Blue)
57. Princess Peach Toadstool - as seen in Super Mario Bros 1 and 2J
58. Princess Peach Toadstool - (Modern-ish version)
59. Princess Daisy
60. Princess Daisy (no crown)
61. Hammer Bros - tiles by P-Tux7
62. Goomba
63. Wario
64. Waluigi? (Pallete Swap) - with Tatanga the Mysterious Spaceman from Super Mario Land
65. Waluigi? (Thin) - with Tatanga the Mysterious Spaceman from Super Mario Land
66. Bomberman - As seen in Bomberman 1
67. Black Bomber - From Bomberman II (Bomberman 1 style sprites)
68. Dragon Warrior - with Slime - AKA Dragon Quest 1 Hero
69. Dragonlord - with Drakee - from Dragon Quest 1
70. Prince of Middenhall - with Slime - AKA Prince of Laurasia, from Dragon Quest II
71. Prince of Cannock - with Red Slime - AKA Prince of Sumaltria, from Dragon Quest II
72. Princess of Moonbrooke - with Metal Slime - from Dragon Quest II
73. Princess of Moonbrooke (Alternate Colors) - from Dragon Quest II
74. Xemn Worzen - from Legacy of the Wizard / Dragon Slayer IV: Drasle Family
75. Meyna Worzen - from Legacy of the Wizard / Dragon Slayer IV: Drasle Family
76. Lyll Worzen - from Legacy of the Wizard / Dragon Slayer IV: Drasle Family
77. Roas Worzen - from Legacy of the Wizard / Dragon Slayer IV: Drasle Family
78. Pochi Worzen - from Legacy of the Wizard / Dragon Slayer IV: Drasle Family
79. Lolo - from Adventures of Lolo & Kirby's Dreamland
80. Lala - from Adventures of Lolo & Kirby's Dreamland
81. Simon Belmont - as seen in Castlevania II: Simon's Quest
82. Quote - with Balrog & King's Sword - from Cave Story
83. Curly Brace - with Balrog & King's Sword - from Cave Story
84. Dana - from Solomon's Key
85. Popolon - as seen in Knightmare II: The Maze of Galious
86. Aphrodite - as seen in Knightmare II: The Maze of Galious
87. Naru Osaka - with Usagi Tsukino - from Sailor Moon
88. Gurio Umino - from Sailor Moon
89. Monika - from Doki Doki Literature Club
90. Sayori - from Doki Doki Literature Club
91. Yuri - from Doki Doki Literature Club
92. Natsuki - from Doki Doki Literature Club
93. Commander Keen - with Little Ampton & Yorp - from Commander Keen
94. Captain Jean-Luc Picard - from Star Trek: The Next Generation
95. Luke Skywalker - with R2-D2 - from Star Wars Episode IV: A New Hope
96. Leia Organa - with R2-D2 - from Star Wars Episode IV: A New Hope
97. Han Solo - with Chewbacca - from Star Wars Episode IV: A New Hope
98. Grand Admiral Thrawn - from Star Wars: Heir to the Empire
99. GRAAL Classic Default Player - AKA GRAAL Newbie, from GRAAL Classic Online
100. Moosh - from In The Lost Kingdom of the Banana Blood God. Tiles by Shane
101. Kell - from Depths of Malice. Tiles by Moosh; character by Russ
102. Riggs - from Depths of Malice. Tiles by Moosh; character by Russ
103. Holm - from Hitodama and Yuurei. By Aevin
104. Desio (Hood Down) - from Yuurand. By Russ
105. Desio (Hood Up) - from Yuurand. By Russ
106. Eli - from Yuurand. By Aevin
107. Eevee - Tiles by Mani Kanina
108. Eevee (NES Version) - tiles by Mitsukara, based on Mani Kanina's
109. Dimivee - tiles by Mitsukara, based on Mani Kanina's; for Dimi
110. Yoshi - tiles by Shane
111. Yoshot - tiles by Shane
112. Mani Kanina - by Mani Kanina
113. Gardea - by Zaxarone
114. Arcana - from HeroOfElements, by HeroOfFire
115. Arcana? - from HeroOfElements, by HeroOFFire
116. Bargo - from BikDip's Adventure, by BikDipOnABus
117. BigJoe - from Xenogears, tiles by BigJoe
118. Hylia Goddess Statue - from Skyward Sword
119. Hylia Goddess Statue (alternate) - from Skyward Sword; tiles by Moosh
120. Zelos Phoenix - from Eiyuu and other stories; by TeamUDF
121. Zelos Phoenix (NES Version) - from Eiyuu and other stories; tiles by Mitsukara
122. Black Mage - from Final Fantasy 1; inspired by MeleeWizard
123. Knuckles - from Amy Rose quests by Eddy; tiles by Lightwulf
124. Amy Rose - from Amy Rose quests by Eddy; tiles by Lightwulf
125. Revenant - from DOOM; tiles by FireSeraphim
126. Samus Aran - from Metroid; tiles by PolygonX8
127. Invisible - Blank tiles
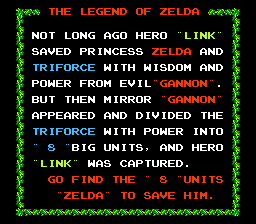
Story
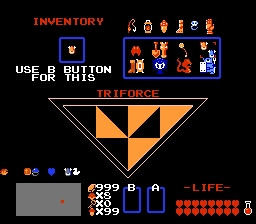
Moments after the events in "The Legend of Zelda", Link is captured by Mirror Gannon and taken to Mirror Hyrule, along with the Triforce of Power which has been broken into eight large pieces.
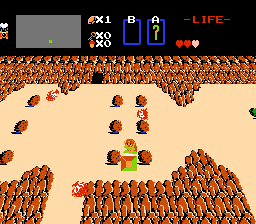
In Mirror Hyrule, everything is familiar, but nothing is quite the same. Princess Zelda must seek the help of strange creatures and unfamiliar items to navigate this reversed world and it's mysteriously intertwined underworld. Is Zelda's wisdom enough to overcome these strange puzzles and save Link... or is she headed straight into a fiendish trap?
In Mirror Hyrule, everything is familiar, but nothing is quite the same. Princess Zelda must seek the help of strange creatures and unfamiliar items to navigate this reversed world and it's mysteriously intertwined underworld. Is Zelda's wisdom enough to overcome these strange puzzles and save Link... or is she headed straight into a fiendish trap?
Tips & Cheats
Each time you continue the game on the overworld, Impa will tell you a hint in the Debug Console window. These hints cycle through 11 possible hints (before cycling back to the first), and those 11 each update if you've obtained certain items or made certain progress. If you're stuck, you can try F6ing a few times to see what all her current hints are. This isn't required, but can help if you have no idea what to do.
Although knowledge of Zelda 1 is not required to beat this game, it is helpful, since there is a Z1-style minimum of explanatory text within the game, and many patterns may look more familiar if you know Z1 well. While this quest has item and puzzle elements more akin to the Gameboy Zelda games, this is overall very much a Zelda 1 fangame.
Dead ends are almost never just dead ends, especially if you had to use a key or do something special to get into them. Explore in detail before you backtrack.
Zelda 1 pushblock logic is in effect. You may need to kill enemies in the room to push a block. You may need to push any block on the screen, although this generally only happens on screens with a few blocks. A certain item you get early on may make it easier to determine which blocks you DON'T need to push, and find the ones you do.
Nothing in the Mode Menu is required, although it can be helpful. Think of the Mode Menu as a sort of breaking of the fourth wall, to adjust the game to your own comfort and enjoyment- whatever makes the game more enjoyable for you is what you should pick.
You can save a lot of time by using the "Save Here" option on the mode menu very often, and thinking about where you want to continue from when you're at the overworld's continue screen since it can take you to dungeon entrances you've visited.
If there are strange spots on the ground, there's a good chance something is hidden in that area.
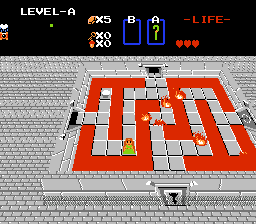
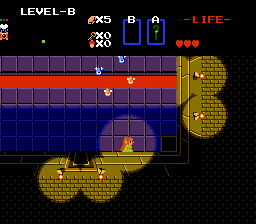
There are 9 dungeons in this quest. The first three are "Level A", and can completed in any order. You must complete all three Level As to get through levels 4-6, which are "Level B". After that comes two dungeons of "Level C", and the final dungeon is "Level D". If you are absolutely stuck finding these dungeons and can't figure out a way in, it might be helpful to...
To play the Randomizer mode (this code is also revealed at the end of the quest):
Although knowledge of Zelda 1 is not required to beat this game, it is helpful, since there is a Z1-style minimum of explanatory text within the game, and many patterns may look more familiar if you know Z1 well. While this quest has item and puzzle elements more akin to the Gameboy Zelda games, this is overall very much a Zelda 1 fangame.
Dead ends are almost never just dead ends, especially if you had to use a key or do something special to get into them. Explore in detail before you backtrack.
Zelda 1 pushblock logic is in effect. You may need to kill enemies in the room to push a block. You may need to push any block on the screen, although this generally only happens on screens with a few blocks. A certain item you get early on may make it easier to determine which blocks you DON'T need to push, and find the ones you do.
Nothing in the Mode Menu is required, although it can be helpful. Think of the Mode Menu as a sort of breaking of the fourth wall, to adjust the game to your own comfort and enjoyment- whatever makes the game more enjoyable for you is what you should pick.
You can save a lot of time by using the "Save Here" option on the mode menu very often, and thinking about where you want to continue from when you're at the overworld's continue screen since it can take you to dungeon entrances you've visited.
If there are strange spots on the ground, there's a good chance something is hidden in that area.
There are 9 dungeons in this quest. The first three are "Level A", and can completed in any order. You must complete all three Level As to get through levels 4-6, which are "Level B". After that comes two dungeons of "Level C", and the final dungeon is "Level D". If you are absolutely stuck finding these dungeons and can't figure out a way in, it might be helpful to...
Spoiler
...look up a map of where dungeon entrances are in Zelda 1's first quest, then consider the shapes of the dungeons you've been to.
To play the Randomizer mode (this code is also revealed at the end of the quest):
Spoiler
Hold EX2, R, and Start during the beginning intro scenes.
Credits
Mitsukara
- Quest Creator
Dimi:
- MASSIVE post-production improvements / 11th hour collab designer. Work includes Final Boss rewrite, massive help with dungeon design on level 9 (and suggestions for 7 and 8 ), implementing the Z3 Scrolling mode, creating the entirety of the Randomizer, and more. Also one of the first beta testers.
--------------------------------------------------------------
---------- Scripts, design advice, and beta testing::
--------------------------------------------------------------
Moosh
- 4 way movement simulation script from BrockLesnar.qst, one of the first beta testers, design feedback, encouragement, being cool about it when we had some of the same ideas, and inspiration for the Impa Hints system.
ZoriaRPG
- "Magic Map" and "Magic Compass" scripts. Thanks for your patience and flexibility about how the contest was run, it improved the experience a lot in the end!
Venrob
- Made an All-Caps zscript function for my enemy names.
LinkTheMaster
- FFC Shooter Script used by Dimi.
HeroOfFire
- Extensive beta testing, design feedback, Randomizer design advice, and help making a location list.
Russ
- Beta testing, design feedback Randomize design advice, and encouragement.
Aevin
- Encouragement and design feedback (watched other testers).
Great Glass
- Beta tester, design feedback, and recommended Z1remade.nsf, by IsabelleChiming.
Zaxarone
- Beta tester, design feedback
Shane
- Beta tester, design feedback
Avaro
- Beta tester, design feedback
Anthus
- Beta tester
ywkls
- Beta tester
-------------------------------------
---------- Music and graphics::
-------------------------------------
Infidelity
"Legend of Link" NSF music, used for default Overworld, intro sequence, and "Dodgy Game" tracks.
IsabelleChiming
"z1remade" and "z2remade" NSF music, used for the default Dungeon themes and Randomizer Menu.
BigJoe
"5thmusic" NSF music from ZC's 5th Quest, used for Gannon's music. Also requested Duke Onkled and created the Xenogears BigJoe costume.
Klopp422 & Klopp422's brother
"Klopp422.nsf" NSF music, used for default Cave Music and for Boss Music (when World Redecorate Mode is on).
P-Tux
- Provided certain optional MIDIs and costumes (where credited), plus the "DarkNaga" enemy tiles.
Other optional music and sounds from:
Koji "Konchan" Kondo: "The Legend of Zelda", "Super Mario Bros", "A Link to the Past", "BS The Legend of Zelda"
Akito "Tsukasan" Nakatsuka: "Zelda II: The Adventure of Link"
Yuzo Koshiro: "Legacy of the Wizard", "Ys" I-II
Mieko Ishikawa: "Legacy of the Wizard", "Ys" I-III
Hideya Nagata: "Ys" II-III
Osamu Kasai: "Ys" II-III
Masaaki Harada: "Ys" II-III
Shinji Nakayama: "Ys" II-III
Hideno Maezawa: "Knightmare II: The Maze of Galious"
Shinya Sakamoto: "Knightmare II: The Maze of Galious"
Atsushi Fujio: "Knightmare II: The Maze of Galious"
Kiyohirio Sada: "Knightmare II: The Maze of Galious"
Kinuya Yamashita: "Knightmare II: The Maze of Galious"
Hideki Kanazashi: "Adventures of Lolo" 1 - 3
Michiharu Hasuya: "Solomon's Key"
Hiro "Hip" Tanaka: Super Mario Land
Koichi Sugiyama: "Dragon Quest" I-IV
Satoe Terashima: "Castlevania," "Castlevania II: Simon's Quest"
Kinuyo Yamashita: "Castlevania"
Kenichi Matsubara: "Castlevania II: Simon's Quest"
Kouji Murata: "Castlevania II: Simon's Quest"
And additional unknown MIDI authors.
-------------------------------------------
---------- Zelda Classic developers::
-------------------------------------------
Phantom Menace
- ZC Creator -
War Lord
Darknation
DarkDragon
Gleeok
jman2050
Joe123
Koopa
_L_
PKMNFRK
Saffith
Sean
Takuya
Venrob
Wolfman2000
ZoriaRPG
-------------------------------
---------- Special thanks::
-------------------------------
MeleeWizard
For helping me get back into ZC through Let's Play videos
Moosh
HeroOfFire
Russ
Aevin
NOTE: If I have missed crediting someon, please feel free to let me know what they made and I'll edit this description to include the credit! (Assuming the credit seems legitimate.)
All submitted costumes are credited on costume banner in-game, and in the costume list in the description above; all others drawn by Mitsukara (though often based on sprites from the games the characters originate from).
Mani Kanina

Posted 18 March 2020 - 07:49 PM
This was, all things considered, a very unique and interesting quest to play through. I don't think there is any other quest or game like this one, which means that if you're looking for something new? Well, this quest sure delivers. That being said, I would not recommend this quest to everyone, it requires a rather fundamental understanding and expertise of Zelda 1 in order to properly progress. I don't mean that in a sense of skillfull play, in fact, this quest has a lot of difficulty modifiers in order to appeal to a wide variety of combat preferences. No, I mean more in how Zelda 1 was literally constructed, on the cartridge, how the screens were placed in memory in relation to one and another. A lot of that stuff is put to great use here, and while it is a bit tutorialized, it can be hard to grasp how it all ties together without that knowledge.
Once you're on the same page as the quest though, it delivers some extremely goofy and silly scenarios and ideas, and it just keep building up more and more of them as the game goes on. It's definitively a puzzle heavy quest, but one that offers a lot of alternative solutions and creative thinking. Not only that, there are some unique and creative minigames as well that are fun to take part in, not to mention some neat, but easy, boss fights. It's a very well rounded experience, it's just not a very traditional one. If you want a more traditional Zelda like quest, there are a lot of much better candidates in the database. If you want what this quest offers though? Well, there is basically only this one. The wide variety of options, including many nice cosmetic ones, makes sure that the adventure is attuned to your difficulty and mechanical tastes, I think just about the only thing you can't make easier is puzzle difficulty.
So yeah, want something new? Give this quest a spin and see what it's like; just expect to have to do some thinking in regards to puzzles.
BurgerKingCenturion

Posted 20 March 2020 - 02:02 PM
i am stuck with boulders in the labyrinths that I can't move when I enter a dungeon, they are all over when I enter a room with those I can't move them, and the enemy I am trying to destroy is indestructible and I can only get what I got so far in this quest, I need major help, ASAP
6th Quest Entry - Through the Inverse GlassStarted by Mitsukara , 15 Mar 2020 |
|

|

