

WARNING!!: This thread needs to be re-written. It has glaring inaccuracies I overlooked when I wrote it.
WARNING!!: This method works for editing the default subscreens.
As of 2.50 RC 3 making subscreens from scratch has not worked for me.
One of several problems is Heart Containers being visible before you collect them, so beware!
If you've ever wanted to make subscreen hearts larger than 8x8 pixels this tutorial is for you.
This tutorial was made in ZQuest Editor 2.50 RC2.
Your default Heart Container (HC) tiles can be found on page 100 (Quest > Graphics > Tiles).
First, make your HC graphics. You will need up to 5 graphics, so that you can display when your
HC is 4/4, 0/4, 1/4, 2/4, and 3/4 full in that order. In this example, the first row is the upper left
portion of your HC, followed by the upper right in the next row, then the lower left, and lower right:
Now that you have your graphics, go to Quest > Misc Data > Subscreens, and choose
the Passive subscreen that you will be using. Click on HC 1 to select it.
Now go to Edit > Properties, here you can see which HC you have selected Container: [1 ]
As you can see by clicking the images, the Not Last, Last, Cap, and After Cap are all set to the same tile:
(Press the Escape key to return without making any changes).
Click on the image under "Not Last" and select the first tile in your upper left Heart Container row:
Once you have it selected, hit the Enter/Return key.
Now choose the same tile for the images under Last, Cap, and After Cap.
(You can change the CSet before you press Enter/Return using the +/- keys)
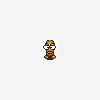
Your first HC will now look something like this in your subscreen:
This is too close to the second HC, so let's move it. To select HC 1, you can click on it, or you can use left and right arrows
on the topmost "d-pad" (the up and down arrows will move the selected graphic to a higher or lower layer).
Once HC 1 is selected, use the arrows on the second "d-pad" to move it 8 pixels to the left (it moves at the rate of 1 pixel per click).
Your subscreen now looks like this:
Now we need to complete your HC 1. Click on Edit > New, select Life Gauge Piece and click "OK"
Change Container: [0 ] to Container: [1 ] IMPORTANT: Be sure to check the 'Mod' box under 'Not Last' and 'Last'.
Now we will need to set the Not Last, Last, Cap, and After Cap to the first tile in your second row:
Now that that's done, move the tile into position:
Now add a Life Gauge Piece for the lower left and lower right parts of your HC, setting the tiles
to your third and fourth row like we've been doing:
Now to test out your new Heart Container give Link a Blue Ring in Quest > Init Data and place
combo 246 on the screen.
Now that you know the process you can make your hearts and size you wish.
Note: When you set up HC 2 your Life Gauge Piece Properties should say Container: [2 ]
HC 3 should say Container: [3 ] and so forth.
EDIT: If your Heart Containers are visible before you collect them the problem is
most likely that the blue boxes are not in the positions seen here:
Credit goes to Jared for figuring this out!
In my example I only inserted graphics for hearts that are 4/4, 0/4, 1/4, 2/4 and 3/4 full (the orange boxes in the diagram).
I did not know that the rest of the tiles should be filled with heart graphics as well:
I was only used to the idea of quarter hearts I did not know that Zelda Classic actually uses SIXTEENTHS of a heart.
This happens when you enhance Link's defensive abilities with items like the Red and Blue Rings, and a couple other items as well.
Edited by Cukeman, 06 September 2017 - 10:26 PM.

