Been thinking of how I want to do level 7 when I finally make my return to working on my quest. I already know the theme; it's just HOW I want to execute it. I was thinking of something where you have to go to four wings of the dungeon to complete it, sometimes having to backtrack between them to ultimately fight the boss. So design-wise, the first part of level 7 would just be a hub/lobby area with no enemies. Each direction would take you to a different "wing" of the dungeon. I'm trying to allow for more open exploration as a contrast to earlier game where everything is the same old linear formula of Key > Key > Dungeon Item > Key > Boss Key. I think allowing freedom to explore most of the dungeon on your own would be better than a pure Z1 style dungeon crawl. Of course, there would be "remember this obstacle for later when you have the item to deal with it" moments.
On another note, at work, I was thinking of a concept kind of like how Matthew Bluefox did Zelda Maxi. However, I would have the levels labelled by their number, followed by a dash and A/B/C/D. You have to go through them in order. Here is a sample flowchart:
-You enter Level 1-A and find a key needed to access Level 1-B.
-In Level 1-B, you find the Blue Candle so you can complete Level 1-C.
-In Level 1-C, with the Blue Candle, you are able to get the Boss Key.
-In Level 1-D, just find the boss and kill it for the Triforce.
Probably a bit too tiring and repetitive, but in trade, the dungeons would generally be rather small (like around 8-12 rooms for the early levels) and in general, straightforward. Death would not be a continuing is painful moment; you would lose maybe a few rooms progress at worst.
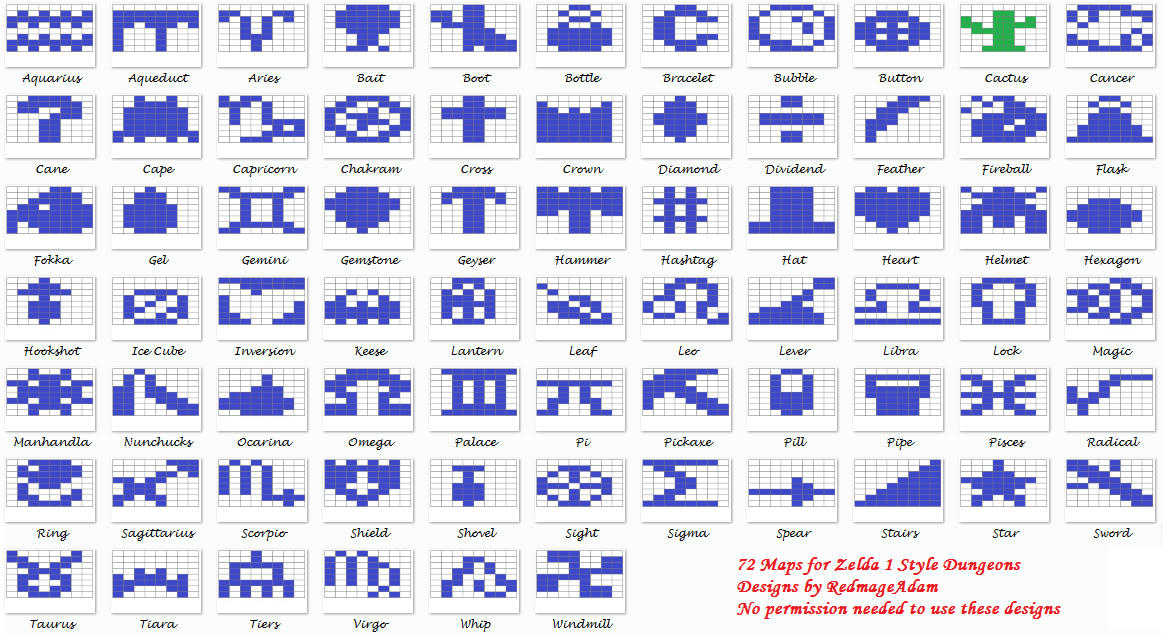
Lastly, remember my Z1 style dungeon maps I posted here last week? I added some more maps, bringing the count up to 72 different maps. Also, I made one slight change due to some feedback I was given. The person that gave it knows who he is and should recognize it immediately along with anyone else familiar with that inside joke. If anyone would like to copy the map designs, go ahead. I really don't care what you do with them. I just made them in my free time anyway, and I doubt I'll actually use any of them. Oh and before you ask, yes, I was inspired to make the maps thanks to all of the Randomizer quests.
A few minor notes:
-Aqueduct is meant to have a gimmick where at one point the map will wraparound. In fact, it's the exact map I used in the 1.92 version of Adam's Quest II, which is gone now, but was easily the most unfair and frustrating experience ever. Hell, the quest never even tells you the dungeon wraps around either (invoke guide dang it trope here).
-Inversion works the opposite; the "empty space" is the dungeon while the blue area is not used.
-The blank spaces between rooms may or may not be used for 10 Rupee rooms or other secrets.
-Yes, I have all 12 Zodiac signs made into dungeons, some prettier than others.