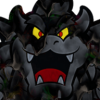
Newbie Boss
Overview
Creator:
Moosh
Updated: Yesterday, 08:42 PM
Tags:
Enemy,
FFC
Downloads: 295
|
Download Example (2.03 MB) |
")
Information
This is a ghosted enemy that's designed with customization in mind. This script is co-authored by Avataro who chipped in to add new attacks when I was too busy. Big thanks to him.
Description Setup Reviews Comments
Warning: This is an Autoghosted enemy. This means you need to not just have the ghost.zh header imported, but you also need the GhostZHActiveScript (included in ghost.zh) in your Active global script slot. Without this, the enemy's script will not load even if you set it as instructed in the enemy editor.
Constants:
First, you'll want to set up the constants at the top of the script for your quest. A (*) indicates a set of similar named constants. Here are the most important ones:
The enemy itself is set up like any other autoghosted enemy, but different behaviors use different fields:
The enemy can have up to three different attacks, but setting attack 2 or 3 to 0 can change the size of the attack pool to something less. If all attacks are 0, it won't do attacks at all.
These attacks are only valid as Attack 1 (Attribute 2) and will happen at certain points in the enemy's movement pattern. When these are triggered depends on the movement style, generally corresponding with when the enemy changes direction.
These attacks are only valid as Attack 1 (Attribute 2) and transform the enemy into another one made with the script. The enemy to reference is indicated by Attribute 6. These can be chained together for enemies with 3 or more cycling forms.
These attacks don't fit into the other attack styles. They give the enemy a persistent effect instead of attacking in a standard way.
Add these numbers together in the enemy's attribute 10 to give it these effects.
These can be placed on the screen to give enemies extra effects.
EZBoss_Effects: This is spawned by the boss itself for some attacks. Make sure it's assigned to a slot, you don't actually need to place it.
EZBoss_ExtraAttacks: This gives the enemy additional attacks.
Constants:
First, you'll want to set up the constants at the top of the script for your quest. A (*) indicates a set of similar named constants. Here are the most important ones:
- C_EZB_LASER*: The three colors for the lasers. These numbers should be written in hexadecimal (preceded by an 0x). The first character is the cset and the second the color within that cset.
- C_EZB_SHOCKWAVE*: Similar to the above but for the shockwaves during certain jump attacks.
- SFX_EZB_*: Various sounds for things the boss does.
- EZB_DONT_REPEAT_LAST_ATTACK: If 0, attacks can repeat freely. If 1, attacks will never repeat. If 2, attacks will never repeat unless there's only 2 attacks.
- EZB_DO_WINDUP_SHAKE: If 2, both medium and strong attacks will make the enemy shake during the windup. If 1, just strong attacks will. If 0, none of them will.
- EZB_FORMCHANGE_ANIM: Affects enemy death tranformations. If 0, enemies will play no animation when transforming. If 1, the animation will play when the enemy's size changes. If 2, the animation will always play.
- EZB_TELEPORT_TYPE: If 0 the enemy will blink when teleporting, if 1 it'll stretch its tile upwards, if 2 it'll use an offset from the enemy's base tile, directly following the firing tiles.
- EZB_ENABLE_SPEEDTRAILS: If 1, dash attacks will have speed trails. Purely visual, take it or leave it.
- EZB_WINDUP_*: The durations of various delays before attacks. Measured in 60ths of a second.
- SPR_EZB_DEATHEXPLOSION: If >0 a sprite (Weapons/Misc) will be used for the enemy's explosion animation. Otherwise it'll be the Zelda 1 bomb effect.
- WIDTH_EZB_DEATHEXPLOSION / HEIGHT_EZB_DEATHEXPLOSION: The tile width and height of the explosion sprite.
- EZB_DEATH_FLASH: If 1, the enemy will flash different csets when exploding.
- EZB_ALWAYS_FAKE_Z: If 1, all enemies can be hit and can hit Link on the Z axis
- STYLE_EZB_LASER: If 0 use 3 color gradient lasers. If 1 use flashing lasers.
The enemy itself is set up like any other autoghosted enemy, but different behaviors use different fields:
- Attribute 1: This is the enemy's movement style. See Movement for further details.
- Attribute 2: This is the enemy's first attack (0 for none). See Attacks for further details.
- Attribute 3: This is the enemy's second attack (0 for none). See Attacks for further details.
- Attribute 4: This is the enemy's third attack (0 for none). See Attacks for further details.
- Attribute 5: This determines how many pixels (0-15) are shaved off the top/bottom and left/right edges of the hitbox. It's a combination of two numbers: X Shave and Y Shave. To get the final value you set here, take X Shave + (Y Shave * 16)
- Attribute 6: This is a special value used by some of the attacks.
- Attribute 7: Set this to how big you want the enemy to be, in tiles. If it's a square enemy this is both the width and height. Otherwise set it to Height*16+Width.
- Attribute 8: Set this to give the projectiles the enemy fires a different sound.
- Attribute 9: Set this to give the projectiles the enemy fires a different sprite. Also sets rotation.
- 4 Way Rotation (AKA what ZC uses): Add +1000 to Attribute 9
- 360 Degree Rotation: Add +2000 to Attribute 9
- Attribute 10: Set this to the sum of all the enemy's flags. See Flags for further details.
- Attribute 11: Set this to the first of the enemy's combos. The enemy's combo setup is walking combos followed by attacking combos. There can be 2, 8, or 16 combos total depending on flags. If you're using combo teleport animations another 1, 4, or 8 combos get added on the end for that animation as well.
- Attribute 12: Set this to the slot this script is loaded into.
- 0 - Halting Walk (4 Directional): This is the standard walking enemy behavior in the enemy editor where it walks for a bit and then stops to shoot. Uses all the enemy editor fields it normally would. It's better used for normal enemies than bosses.
- 1 - Constant Walk (4 Directional): This is the same as above but minus the halting period. Attacks will still trigger periodically based on Halt Rate.
- 2 - Constant Walk (8 Directional): This is the standard Bat behavior from the enemy editor. Uses all the fields it normally would. Attacks will still trigger periodically based on Halt Rate.
- 3 - Walk Toward Link: This makes the enemy move straight towards Link constantly. Step speed determines how fast it moves. Attacks will still trigger periodically based on Halt Rate. If homing is >0, it specifies a radius in which the enemy can respond to Link attacking with one of its own.
- 4 - Wall Bounce: This will make the enemy move in a random direction and bounce off any walls it hits. Step speed determines how fast it moves. Attacks will still trigger periodically based on Halt Rate.
- 5 - Periodic Re-aim: This is like Walk Toward Link only the enemy is a little less persistent, instead walking in one direction and updating its aim periodically. Step determines how fast it moves. Attacks will still trigger periodically based on Halt Rate.
- 6 - Lazy Chase: This will make the enemy accelerate towards Link gradually, floating about in a sort of orbit pattern around him. Homing factor determines how fast it accelerates. Step speed determines its top speed. Attacks will still trigger periodically based on Halt Rate.
- 7 - Hopping: The enemy alternates between pausing and hopping towards Link. Attack frequency is based on random rate. It has a 1 / (Random Rate / 2) chance of attacking after jumping with a max jump count of Random Rate. Halt Rate affects the delay between hops. Homing affects the randomness of jump directions with higher values being more random and lower being more aimed towards Link.
- 8 - Teleporting: The enemy teleports around. It has a 1 / (Random Rate / 2) chance of attacking after teleporting with a max teleport count of Random Rate. Halt Rate affects the delay between teleports.
- 9 - Hopping (Fast): Similar to hopping, but the enemy doesn't pause while on the ground and the jumps can vary in height. Homing determines the base height of the jump while random rate determines how much the height varies (0-80% in either direction). Halt Rate affects the randomness of jump directions with higher values being more random and lower being more aimed towards Link.
- 10 - Run Away: The enemy will try to keep its distance from Link. Homing determines the distance it tries to keep at. If 0 it will always move away.
- 11 - Turn at Wall: The enemy will continue to move straight until it reaches a wall at which point it'll make a turn. Random rate determines the type of turn:
- 0: 90°
- 1: -90°
- 2: 180°
- 3: Random -90° or 90°
- 12 - Skitter (4 Directional): The enemy will move in short bursts in four directions before halting. Random rate determines how often the enemy turns. Halt rate determines attack frequency. Homing determines how long it stays in place for.
- 13 - Skitter (8 Directional): The enemy will move in short bursts in eight directions before halting. Random rate determines how often the enemy turns. Halt rate determines attack frequency. Homing determines how long it stays in place for.
- 14 - Teleport (Fast): Same as teleport but the animation goes much faster.
- 15 - Follow Wall: The enemy moves along walls. Random rate determines the type of turn:
- 0: Clockwise
- 1: Counterclockwise
- 2: Random
- 16 - Fishrobe: This is based on my fish wizard enemies from EotM. They follow the usual walking pattern but can phase diagonally and will attack Link when he steps in their line of sight. Halt Rate determines their attack cooldown length.
The enemy can have up to three different attacks, but setting attack 2 or 3 to 0 can change the size of the attack pool to something less. If all attacks are 0, it won't do attacks at all.
- 1 - Dash: The enemy dashes at Link to deal contact damage.
- 2 - Projectile (Directional): The enemy fires a projectile in the direction it's facing.
- 3 - Projectile (Aimed): The enemy fires a projectile at Link.
- 4 - Triple Shot (Directional): The enemy fires a triple shot in the direction it's facing.
- 5 - Triple Shot (Aimed): The enemy fires a triple shot at Link.
- 6 - Stream (Directional): The enemy fires 10 projectiles in quick succession in the direction it's facing
- 7 - Stream (Aimed): The enemy fires 10 projectiles at Link.
- 8 - Breath (Directional): The enemy fires a spread of projectiles in the direction it's facing.
- 9 - Breath (Aimed): The enemy fires a spread of projectiles at Link.
- 10 - Bullet Sweep (Directional): The enemy fires a sweep of projectiles in the direction it's facing
- 11 - Bullet Sweep (Aimed): The enemy fires a sweep of projectiles at Link
- 12 - Bullet Barrage: Fires several rounds of tightly grouped projectiles at Link.
- 13 - Bullet Swirl: Fires 5 streams of projectiles in a circular swirl pattern.
- 14 - Bullet Rings: Releases 3 rings of bullets.
- 15 - Laser: Fires a laser at Link.
- 16 - Large Laser: Fires a double damage large laser at Link.
- 17 - Laser Spread: Fires a spread of 5 lasers at Link.
- 18 - Laser Cross: Fires four lasers in a cross pattern that spin around it.
- 19 - Summon 1 Enemy: Uses Attribute 6 for the enemy ID.
- 20 - Summon 2 Enemies: Uses Attribute 6 for the enemy ID.
- 21 - Summon 3 Enemies: Uses Attribute 6 for the enemy ID.
- 22 - Homing Shot: Fires a single slow moving projectile that homes in on Link for a little while.
- 23 - 5 Aimed Shots (With Delays): Fires 5 projectiles at Link in succession.
- 24 - 10 Aimed Shots (Quick): Fires 10 projectiles at Link in quick succession.
- 25 - Aimed Bullet Circle: Fires a circle of projectiles that aim at Link.
- 26 - 4 Way Shot (Normal): Fires projectiles in 4 directions.
- 27 - 4 Way Shot (Diagonal): Fires projectiles in 4 directions diagonally.
- 28 - 8 Way Shot: Fires projectiles in 8 directions.
- 29 - Bullet Storm: Fires a storm of projectiles from one side of the screen.
- 30 - Laser Storm: Fires random lasers horizontally.
- 31 - Laser Expansion: Fires vertical lasers expanding from the enemy's position.
- 32 - 2 Shots: Fires two shots on both sides of Link with a 40° spread.
- 33 - Bash: Similar to Dash but with limited range.
- 34 - Shooting Dash: Same as Dash but leaves a trail of projectiles behind it.
- 35 - Double Dash: Two dashes in a row.
- 36 - Jump: Jumps at Link
- 37 - Double Jump: Jumps at Link twice
- 38 - Jump with Shockwave: Jumps at Link and creates a damaging shockwave where it lands
- 39 - High Jump with Shockwave: Jumps high into the air, then slams down and creates a shockwave.
- 40 - High Jump with Falling Projectiles: Jumps high into the air, then slams down and drops exploding projectiles on the arena.
- 41 - High Jump with Falling Enemies: Jumps high into the air, then slams down and drops 4-7 enemies. The enemies use Attribute 6. Please keep in mind that with this many enemies they should be pretty weak.
- 42 - Chase: Briefly chases after Link as if using the Walk Towards Link movement style.
- 43 - Backdash: Dash away from Link. If there's no room, perform a regular dash.
- 49 - Megalaser: Shoots a massive laser that covers most of the screen, also pushing the enemy backwards in the process. Should be used in big empty rooms only.
- 52 - Flying Slam, Shockwave: The enemy jumps in the air, hovers for a bit, and then creates a shockwave. The shockwave is slightly smaller than the high jump version.
- 53 - Flying Slam, Rocks Fall: The enemy jumps in the air, hovers for a bit, and then drops exploding projectiles on the arena. Spawns less projectiles than the high jump version.
- 54 - Flying Slam, Enemies Fall: The enemy jumps in the air, hovers for a bit, and then drops enemies from above. The enemies spawned are indicated by Attribute 6. Spawns less enemies than the high jump version.
- 55 - Sine Wave Stream (Directional): The enemy shoots a stream of sine wave projectiles in the direction it's facing.
- 56 - Sine Wave Stream (Aimed): The enemy shoots a stream of sine wave projectiles at Link.
- 57 - Sine Wave 5 Shot Circle Stream: The enemy shoots 5 streams of sine wave projectiles all around it.
- 58 - Reaim 2 Shot (Directional): The enemy shoots 2 shots that reaim at Link after travelling as short distance. The shots start in the enemy's direction.
- 59 - Reaim 2 Shot (Aimed): The enemy shoots 2 shots that reaim at Link after travelling as short distance. The shots start aimed at Link.
- 60 - Throw, Fixed Distance: The enemy throws a projectile at Link that arcs over a fixed distance. When it lands, the effect depends on the enemy's Weapon Type.
- 61 - Throw, To Link: The enemy throws a projectile at Link that arcs to where he was standing. When it lands, the effect depends on the enemy's Weapon Type.
- 62 - Throw, To Link, Stream: The enemy throws a series of projectiles at Link that arc to where he was standing. When they land, the effect depends on the enemy's Weapon Type.
- 63 - Throw, Fixed Distance, 5 Shot: The enemy throws 5 projectiles at Link that arc over a fixed distance. When they land, the effect depends on the enemy's Weapon Type.
- 64 - Throw, 6 Shot, Volley: The enemy throws 6 projectiles at Link that travel at random distances, angles, and heights. When they land, the effect depends on the enemy's Weapon Type.
- 65 - Throw, Splash: The enemy throws 18 projectiles in random directions that go all over the screen. When they land, the effect depends on the enemy's Weapon Type. Best not to use this with a screen filling weapon type like fire or super bomb.
- 66 - Linear Shots (Directional): The enemy shoots a line of projectiles of varying speed in the direction it's facing.
- 67 - Linear Shots (Aimed): The enemy shoots a line of projectiles of varying speed at Link.
- 68 - Teleport, Then Shoot: The enemy teleports and then shoots one shot at Link.
- 69 - Teleport, Then Triple Shot: The enemy teleports and then shoots three spread shots at Link.
- 70 - Triple Teleport, Then Linear Shots: The enemy teleports three times and then shoots a line of projectiles of varying speed at Link.
- 72 - Laser Lattice: Creates a crisscross laser pattern across the entire screen, like Bastille from Forbidden Ascent.
- 73 - Laser Dash: Move to either side of Link and leave a trail of aimed lasers.
- 74 - Laser Box: Creates a laser box that closes in on Link's position from the sides of the screen.
- 75 - Fast Rebound: Draw a sight line and then bounce rapidly around the screen.
- 76 - Wall Bouncer: Shoot a projectile that bounces off walls
- 77 - Wall Bouncer (Triple Shot): Shoot three projectiles that bounce off walls
- 78 - Wall Bouncer (Fast): Shoot a faster projectile that bounces off walls.
- 79 - Splitting Shot: Shoot a projectile that splits into multiple copies of itself. Like Helmasaur King.
- 80 - Lightning (Downward): Walk towards the top of the screen, then shoot lightning downward. Like Agahnim.
- 81 - Lightning (Teleport): Teleport then shoot lightning in the direction the enemy is facing.
- 82 - Lightning (Teleport, Stream): Teleport 5 times quickly, then shoot a stream of lightning that turns towards Link.
- 83 - Slash (Directional): Slash with a sword in the direction the enemy is facing. Sword uses enemy's last combo +1.
- 84 - Slash (Aimed): Slash with a sword in Link's direction. Sword uses enemy's last combo +1.
- 85 - 3 Slashes: Slash three times while moving towards Link. Sword uses enemy's last combo +1.
- 86 - 5 Stabs: Stab five times while moving towards Link with mild homing. Sword uses enemy's last combo +1.
- 87 - Spin Attack: Charge up the sword and do a great spin attack. Sword uses enemy's last combo +1.
- 88 - Greatsword Slash: Slash with a 2x1 greatsword. Sword uses enemy's last combo +2.
- 89 - Greatsword Stab Rush: Stab repeatedly with a 2x1 greatsword. Sword uses enemy's last combo +2.
- 90 - Greatsword Spin Attack: Charge up the 2x1 greatsword and do a great spin attack. At the end releases a burst of thrown projectiles from the tip. Sword uses enemy's last combo +2.
These attacks are only valid as Attack 1 (Attribute 2) and will happen at certain points in the enemy's movement pattern. When these are triggered depends on the movement style, generally corresponding with when the enemy changes direction.
- 44 - Constant Attack - Fireball, Directional: The enemy shoots a fireball in the direction it's facing.
- 45 - Constant Attack - Fireball, Aimed: The enemy shoots a fireball aimed at Link.
- 46 - Constant Attack - Summon: Summons an enemy specified by Attribute 6.
- 47 - Constant Attack - Fireball, 4 Way Shot (Normal): The enemy shoots 4 fireballs going in a + pattern.
- 48 - Constant Attack - Fireball, 4 Way Shot (Diagonal): The enemy shoots 4 fireballs going in a X pattern.
These attacks are only valid as Attack 1 (Attribute 2) and transform the enemy into another one made with the script. The enemy to reference is indicated by Attribute 6. These can be chained together for enemies with 3 or more cycling forms.
- 50 - Transform (Barrier Shift): After every attack, the enemy takes on the defenses and CSet of a different enemy.
- 51 - Transform (Complete): After every attack, the enemy takes on all properties (as accessible with ZScript) of a different enemy. The other enemy has to be using Newbie Boss as well.
- 71 - Transform (On Death): After dying, the enemy takes on all properties (as accessible with ZScript) of a different enemy. The other enemy has to be using Newbie Boss as well.
These attacks don't fit into the other attack styles. They give the enemy a persistent effect instead of attacking in a standard way.
- 91 - Speed Up x2: The enemy accelerates over time to double its base speed. Time per level of speed up is defined by FRAMES_EZB_SPEEDUP.
- 92 - Speed Up x3: The enemy accelerates over time to triple its base speed. Time per level of speed up is defined by FRAMES_EZB_SPEEDUP.
- 93 - Speed Up x4: The enemy accelerates over time to quadruple its base speed. Time per level of speed up is defined by FRAMES_EZB_SPEEDUP.
Add these numbers together in the enemy's attribute 10 to give it these effects.
- 1 - 4-Way: Makes the enemy's combos be in sets of four (Up, Down, Left, Right)
- 2 - 8-Way: Makes the enemy's combos be in sets of eight (Up, Down, Left, Right, Up-left, Up-right, Down-left, Down-right)
- 4 - Flying: Makes the enemy ignore pits, water, and solidity and be blocked by No Flying Enemy combos.
- 8 - Aquatic: Makes the enemy's movement limited to water combos.
- 16 - No Fall: Prevents the enemy from falling in sideview. (Pretty much necessary for sideview ATM)
- 32 - Explode on Death: Makes the enemy explode when it dies.
- 64 - Face Link: Makes the enemy face Link while moving.
- 128 - Unblockable: Makes all the enemy's projectiles unblockable.
- 256 - Knockback Enabled: The enemy takes knockback when hit
- 512 - No Collision: The enemy deals no collision damage to Link but can still be stunned. If you want it to have no collision at all, give it immunity to all weapons. This flag has the side effect of preventing the enemy from being affected by stunning weapons and clocks, because of how the effect is handled (it uses the stun variable).
- 1024 - No Stun: The enemy won't be stunned by any stunning weapons. Like the above but with collision damage still enabled. This way if you have stunning weapons that also deal damage you can still damage with them without stunning.
- 2048 - Sequential Attack: The enemy will cycle through attacks sequentially instead of at random.
These can be placed on the screen to give enemies extra effects.
EZBoss_Effects: This is spawned by the boss itself for some attacks. Make sure it's assigned to a slot, you don't actually need to place it.
EZBoss_ExtraAttacks: This gives the enemy additional attacks.
- D0: The enemy ID of the enemy to apply this script to.
- D1-D7: Attacks to add. 0 for none. Attack types that explicitly require the enemy's Attribute 2 can't be added this way.
- D0: The enemy ID of the enemy to apply this script to.
- D1-D3: The three colors for the enemy's lasers. 0 for defaults. These must be converted from hexadecimal to decimal. You can preview these values using the 8-bit tile editor.
- D4-D6: The three colors for the enemy's shockwaves. 0 for defaults. These must be converted from hexadecimal to decimal. You can preview these values using the 8-bit tile editor.
- D0: The enemy ID of the enemy to apply this script to.
- D1: The number of attacks the enemy stays in its current form for.
- D2: A random chance to change forms (1/n) after D1 runs out.
- D3-D7: Enemy IDs to add to the transformation pool. These must be using Newbie Boss to work.